
30 Jan How To Add A User To Alarm.com
If you have an Alarm.com system or account you need to know how to add a user to Alarm.com. In this blog post, we’ll teach you how to add a user to alarm.com and grant them appropriate access while maintaining control over your system’s security. Adding users to your Alarm.com account enables trusted individuals to access and control your security settings, providing extra convenience and safety. Here’s a comprehensive guide on how to add a user to Alarm.com.
Why add users to your system?
- You should not have one code for the home or business. When everyone has their own code they are more likely to remember it and you will have a history of who came and went. And if you want to remove them as a user in the future it will be easier if they have their own code.
- It makes it more convenient giving access to others, and if they use their own code you can always remove it.
There are two types of users you can add. A keypad or doorlock user and a website or app user. First we will review how to add a keypad or lock user.
There are two ways to add a user to alarm.com: via a web browser and through the Alarm.com mobile app. Both methods follow similar steps but offer the convenience of managing user access from different interfaces. Using a web browser or a mobile app to add a user depends on personal preference and convenience. Whether you’re at your computer or on the move, Alarm.com’s dual functionality ensures that you have the flexibility to manage your home security system’s access permissions efficiently.
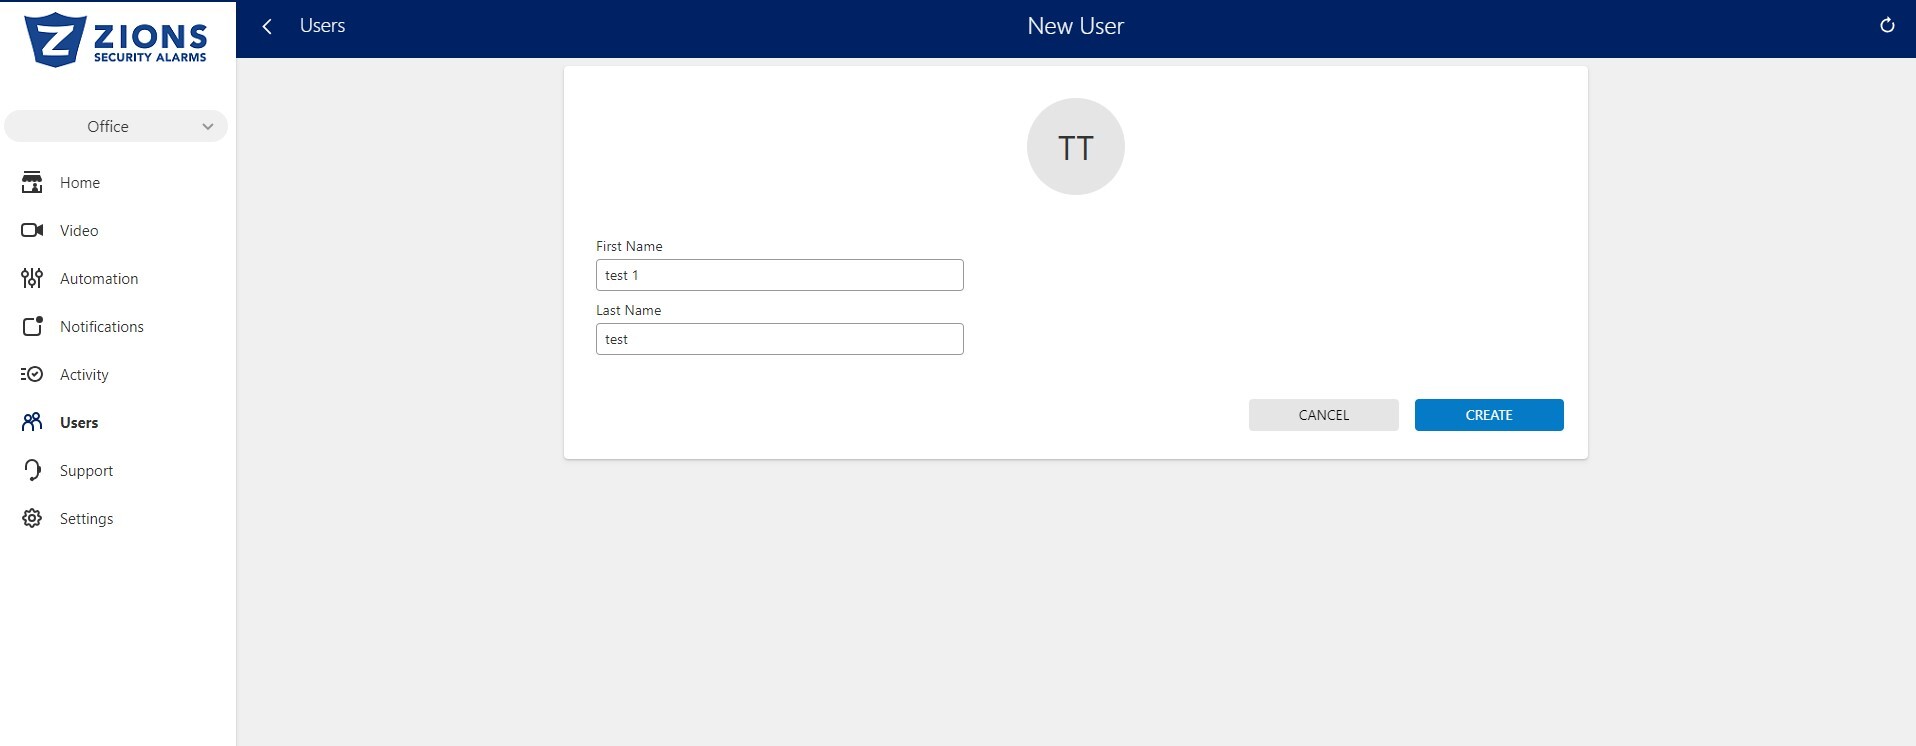
To create new system user codes for single systems using the Alarm.com customer website:
- Log into the Alarm.com customer website.
- Click Users.

- Click Add User.
- Enter the user’s first and last name, and then click Create.

- In Access Code, enter the user’s desired code.
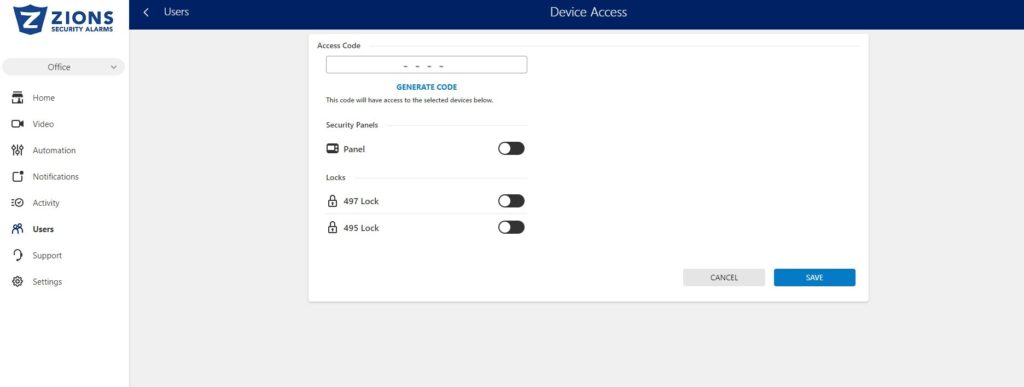
- Click the toggle switch for the devices (i.e., panel partitions and locks) to enable/disable access for the user’s code. (If you do not give them access to anything then their code is useless)
- Click Save. Allow a few minutes for the new user code to be active on the panel.
- To add user contact information, click Add Contact.
- Then click either:
- Mobile Number to add a mobile number. Then enter the mobile number and select the Country and Carrier using the dropdown menus.
- Email Address to add an email address. Then enter the email address and select the Email Format using the dropdown menu.
- Click Save to add the new contact information.
- Then click either:


Allow a few minutes for new user codes to be active on the panel. If the new user code does not work on the panel or you have additional questions, contact us.
Here is a Video Guide:
To create new system user codes for single systems using the Alarm.com app:
- Log into the Alarm.com app.
- Tap
 .
.
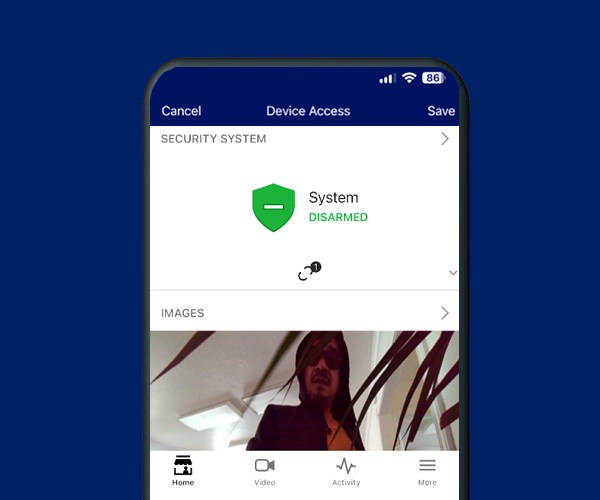
- Tap Users.
- Tap
 .
. - Enter the user’s first and last name, and then tap Create.

- In Access Code, enter the user’s desired code.
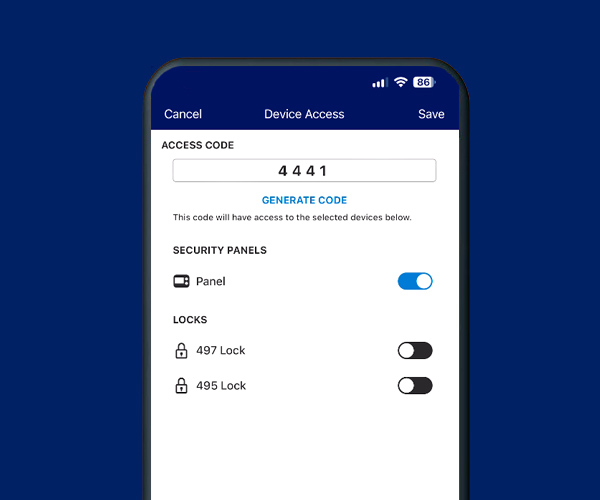
- Tap the toggle switch for the devices (i.e., panel partitions and locks) to enable/disable access for the user’s code.
- Tap Save. Allow a few minutes for the new user code to be active on the panel.
- To add user contact information, tap Add Contact.
- Then tap either:
- Mobile Number. Enter the mobile number, and select the Country and Carrier using the dropdown menus.
- Email Address. Enter the email address, and select the Email Format using the dropdown menu.
- Tap Save to add the new contact information.
- Then tap either:
Allow a few minutes for new user codes to be active on the panel. If the new user code does not work on the panel or you have additional questions, contact us.
Following these steps, you can seamlessly add users to your Alarm.com account using a web browser or a mobile app. This modification helps highlight the two distinct approaches available to users for adding a new user to their Alarm.com accounts.
Here is a Video Guide:
No Comments