08 Aug How to Set Up Episode Radiance Outdoor Speakers And Lighting
Bring the Party Outdoors with Radiance Outdoor Speakers & Lighting — One Cable, Complete Experience
Transform your backyard, patio, or poolside into a stunning, immersive entertainment oasis with Radiance Outdoor Speakers and Lighting. Designed to combine brilliant LED lighting and high-performance audio in a single cable system, Radiance delivers the ultimate outdoor experience with streamlined installation and uncompromising quality.

What Is the Radiance Outdoor System?
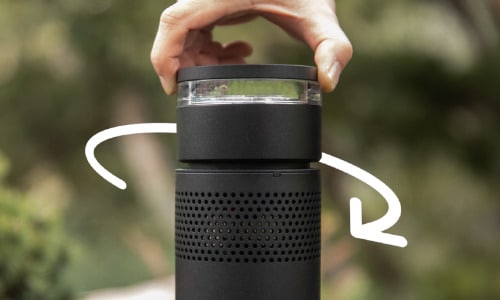
Radiance is a revolutionary outdoor audio + lighting solution by Coastal Source, developed in collaboration with top audio brands. It features bollard-style speakers that combine 360-degree audio dispersion with elegant LED lighting — all powered and controlled via a single cable. The result is a clean, professional-grade installation without the complexity or clutter of separate lighting and sound systems.
Components Needed for a Complete Setup
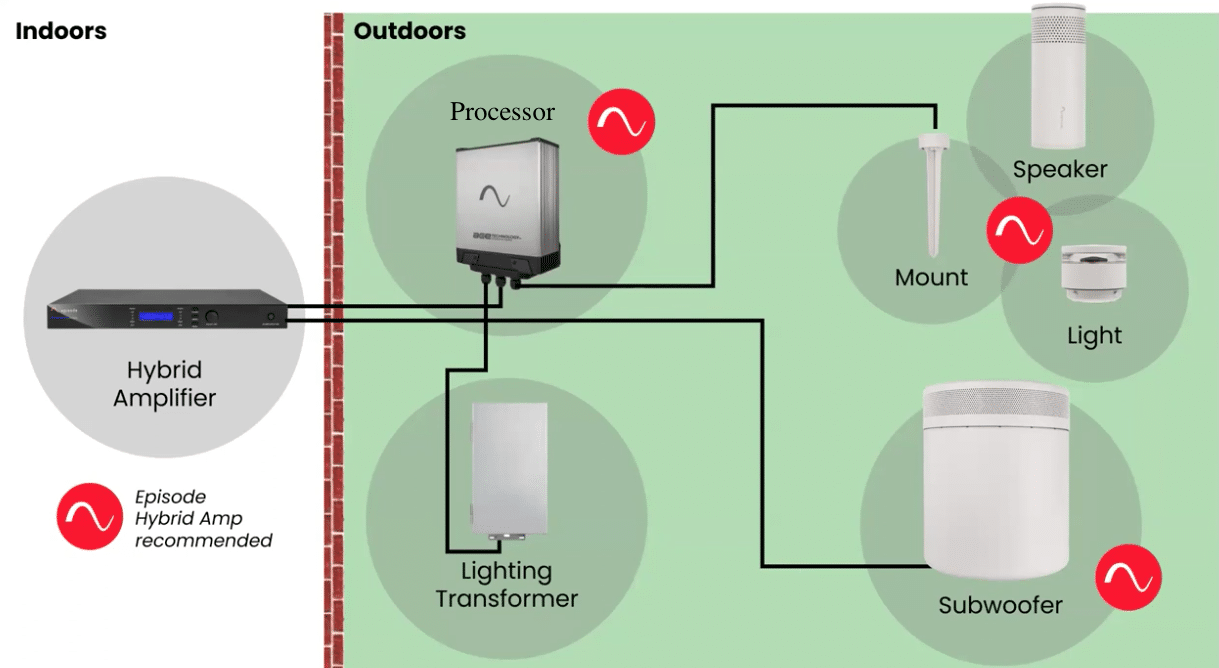
To build a Radiance system, you’ll need:
- Radiance Speaker and Light Bollards:
- Each bollard features a built-in LED lighting fixture and high-fidelity speaker.
- Available in various configurations: speaker-only, light-only, or combo units.
- Radiance Subwoofer
- Episode Radiance Audio System:
- Radiance Audio Distribution Module (ADM)
- Radiance Amplifier: Powers the speakers and lighting with intelligent control.
- Episode Radiance Lighting Control System:
- Lighting Control Module: This controls power and dimming for the lighting side of the bollards.
- Transformer: Supplies low-voltage power to the system.
- Control System Integration: Optional, but you can integrate it with systems like:
- Control4
- Lutron
- RTI
- URC
- Voice assistants (if supported via hub)
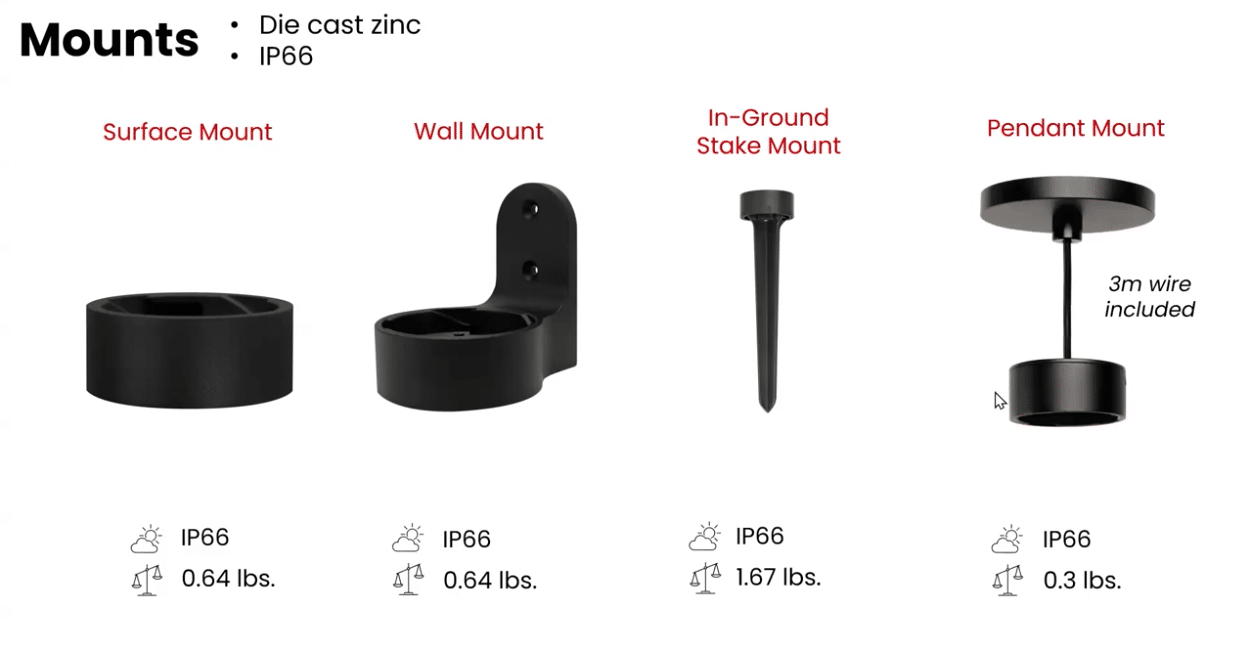
- Episode Radiance Accessories & Mounts:
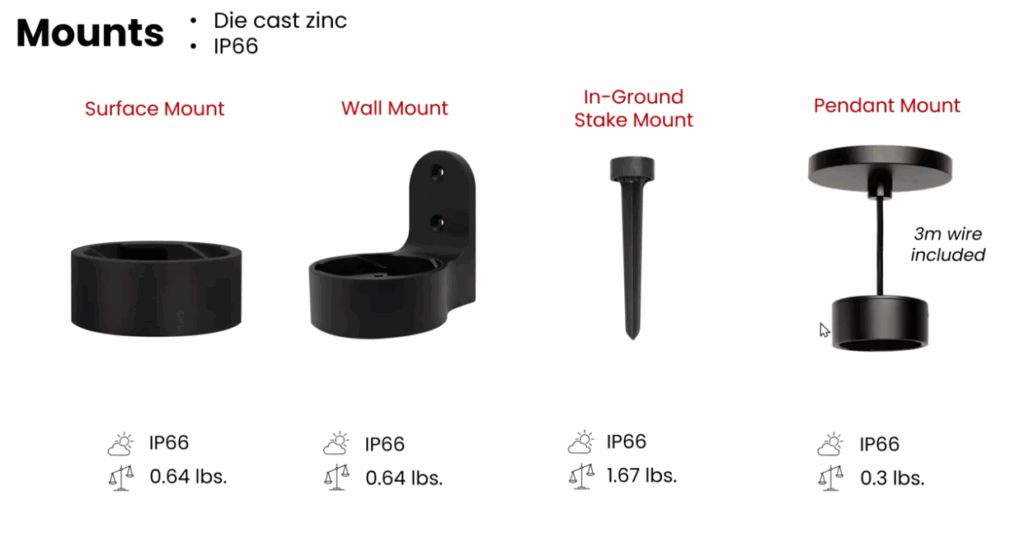
- Ground Stakes, Surface Mounts, or Pendant Mount: Needed to install the bollards in the ground or on a solid surface like concrete or decking.
- Extension Poles (optional): If you want additional height for the bollards.
- Power and Cabling:
- Low-voltage wiring (typically 14/2 or 16/2 burial-rated wire) for power to lights
- Speaker wire (typically 16/2 or 14/2 burial-rated wire) for audio
- Junction boxes for power distribution
- Power supply for lighting, if not using an integrated one in the amp/control module
- Optional Enhancements:
- Wi-Fi Extender or Outdoor Mesh Node for network-connected control
- Landscape Audio DSP or EQ control (some amps offer this)
- Smart scheduling for lighting scenes
Step-by-Step Installation Instructions
Step 1: Evaluate, Plan and Design Your Outdoor Layout:

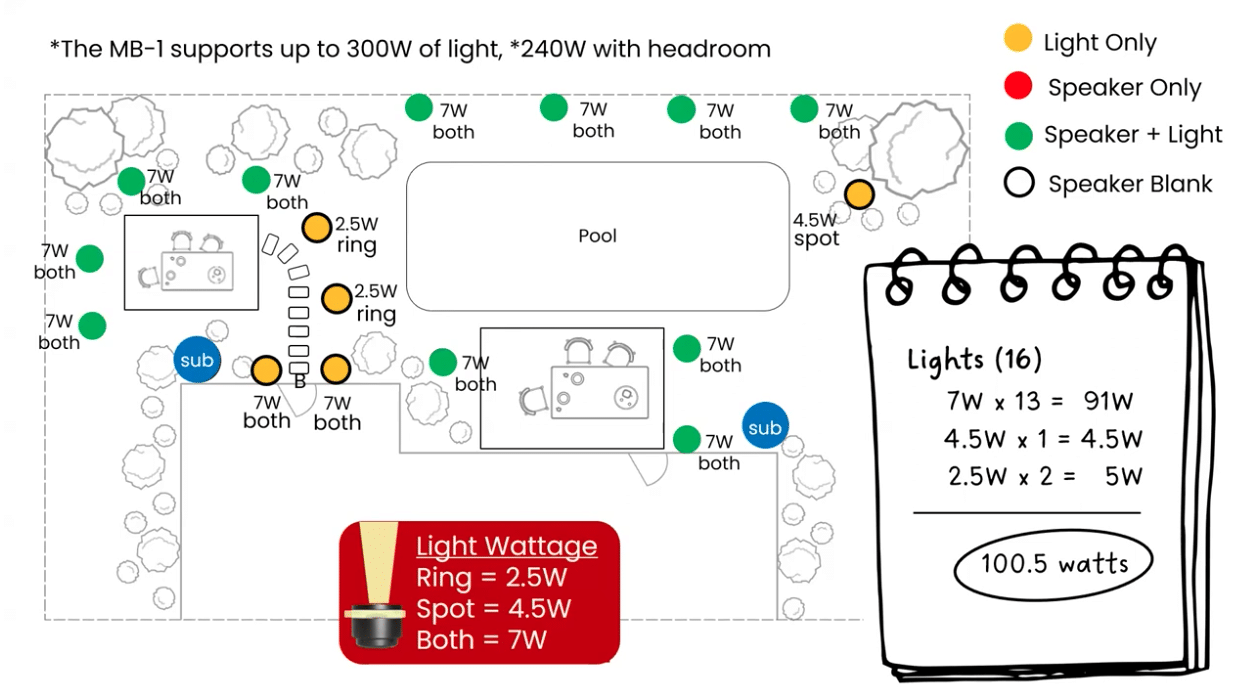
The first step in installing the Radiance Outdoor Speakers and Lighting system is to evaluate and plan the outdoor space and design your layout. Walk around the backyard or outdoor area and identify where you’d like to add both sound and lighting. Common zones include patios, walkways, pool decks, and garden beds. Think about where guests gather, where you want ambient lighting, and what areas would benefit from audio coverage. Sketch out a rough plan of your layout and mark potential bollard locations. This will help you visualize coverage and plan cable routing efficiently. Avoid pointing lights into seating areas or neighbors’ windows, and consider how your home’s network or Wi-Fi will interact with any smart control features you plan to use.
Step 2: Choose the Right System Components:
Once your layout is planned, select the Radiance components based on your needs for each zone. You’ll likely want full combo bollards, which include both audio and lighting, for high-traffic entertainment areas like patios or pool decks. In zones where you already have lighting, speaker-only bollards might suffice. Similarly, for walkways or garden edges, light-only bollards can provide elegant illumination without sound. Be sure to measure your total power and speaker load to ensure it’s within the capacity of your amplifier and transformer. Also, gather the necessary accessories such as extension cables, mounting kits, and connection hubs to make installation smoother.
Step 3: Prepare the Site and Route the Cables:
With your equipment ready, it’s time to prepare the installation site. For in-ground installations, use a flat spade or trenching tool to create a trench roughly 6 to 8 inches deep. This will protect your Radiance cables and keep your landscape looking tidy. If you’re installing on a hardscape surface like a patio or deck, use surface-mount cable protectors or conduit to route the cable. Make sure to plan out your cable path carefully, keeping it clear of high-traffic areas where tripping hazards could occur. Measure the distance between the amplifier and each bollard to determine your cable lengths accurately. This is also a good time to ensure that all your connections will be weatherproof and secure.
Step 4: Position and Mount the Bollards:
Now you can position and install the Radiance bollard speakers. Combo units should be placed in areas where people will gather—near outdoor dining areas, fire pits, or lounge zones. Spacing is important for both lighting and audio balance, so try to maintain a consistent distance of around 10 to 15 feet between speaker units. Use ground stakes if you’re installing into soft landscaping like grass or mulch, or surface mounts for decks, pavers, or concrete. Keep each unit level and ensure the lighting is angled to cast a soft, even glow across the target area without creating glare.
Step 5: Make the Cable Connections:
With your bollards in place, it’s time to connect the system. This tool-free connection method ensures a secure, weather-sealed connection that’s designed to last in outdoor environments. Connect each bollard to the main Radiance cable, either in a daisy-chain format or via hubs, depending on your layout. Bse sure to match up each connection correctly to maintain the proper polarity and prevent any system issues. This is also a good opportunity to label your zones for easier troubleshooting or adjustment in the future.
Step 6: Install the Radiance Control Equipment:
Next, install the system’s control components. The Radiance Amplifier, MusicStreamer, and Transformer should be located near a reliable power source, ideally in a protected area or weatherproof housing. Connect the amplifier to the speaker zones and the transformer to provide low-voltage power for both lighting and audio. The MusicStreamer acts as your audio source controller, linking to your existing media systems such as Sonos, BluOS, or Control4. Depending on your setup, you’ll use CAT5/6 cables, RCA connectors, or other digital audio inputs to link everything together. Be sure your components have proper ventilation and are securely mounted.
Step 7: Power Up and Test the System:
With everything connected, power on the system and test each component. Check that all bollards light up and that sound is coming through clearly. Walk around the space and listen to the audio levels—adjust the amplifier or speaker placement if any zones are too quiet or too loud. Make sure the lighting is evenly distributed and dimmable if applicable. If you’re using smart home integration, test your control app or automation features to confirm everything is working correctly. This is the moment where you fine-tune the experience for comfort and impact.
Step 8: Final Touches and Clean-Up:
Once testing is complete and the system is running smoothly, finish your installation by cleaning up the site. Backfill any trenches with soil, replant any disturbed landscaping, and cover any visible cables with mulch or hardscape elements. Double-check all weatherproof seals and connections to ensure long-term durability. Taking photos of your final setup and cable paths is a good idea for future maintenance or upgrades. Leave a bit of slack in the cables in case you decide to reposition or expand the system later on.
As a key addition to your Radiance system, don’t forget to include at least one Subwoofer per setup. A single Radiance Subwoofer can support up to eight bollard speakers and delivers powerful, full-range bass to elevate the overall sound experience. Featuring a 10″ high-output driver housed in a waterproof rotomolded enclosure, the subwoofer is built for durability and performance in any climate. It can be installed in one of three ways—surface mounted for visibility and easy access, partially buried to blend into landscaping, or ground mounted for discreet placement in open areas.
Notes before and after installation:
- Turn OFF transformer and Amp when making connections
- Use discretion with the placement of speakers and lighting
- Daisy-chain the speakers (run in parallel)
- Hide the transformer and the ADM/Light Control Module from plain sight
- Use protective rubber cap to cover mount connections before installing lights and speakers
Final Checks:
Before finishing, double-check the following:
- All connections are weather-sealed.
- Speaker audio is balanced across all zones.
- LED lighting is consistent and dimmable (if applicable).
- Cables are buried or hidden safely.
- Control system integration is working (test volume, zones, and lighting scenes).
With these detailed steps, your Radiance Outdoor Speakers and Lighting system will be set up for years of seamless use. This integrated solution brings elegant lighting and rich audio together in one streamlined package—perfect for everything from quiet evenings to lively outdoor parties. For expert help, a certified dealer like Zions Security Alarms can handle the design and installation process from start to finish, ensuring your outdoor space is both beautiful and functional.
No Comments