How to Set Kwikset Lock to Auto-Lock

How to Set Kwikset Lock to Auto-Lock

How to Set Kwikset Lock to Auto-Lock

Nowadays, it’s all about making things easy. Kwikset locks are great because they keep your stuff safe and they’re really easy to use. With the auto-lock feature, you don’t even have to worry about locking it yourself. It does it for you! Whether you’re busy or just want to feel secure, turning on auto-lock is a big help. In this guide, we’ll show you How to Set Kwikset Lock to Auto-Lock step by step, and you can even choose how long it takes to lock automatically.

Before diving into setting up the auto-lock feature, it’s crucial to ensure that your Kwikset lock is properly installed and in working condition. Verify that the lock mechanism is securely installed in your door and that it operates smoothly. Test the lock by manually locking and unlocking it to confirm that it functions correctly. Additionally, check that the batteries powering the lock are fresh and properly installed. Taking these steps will ensure that your lock is ready for configuration and will operate reliably once the auto-lock feature is enabled.

Setting Up Auto-Lock:

Step 1: Remove the Interior Cover

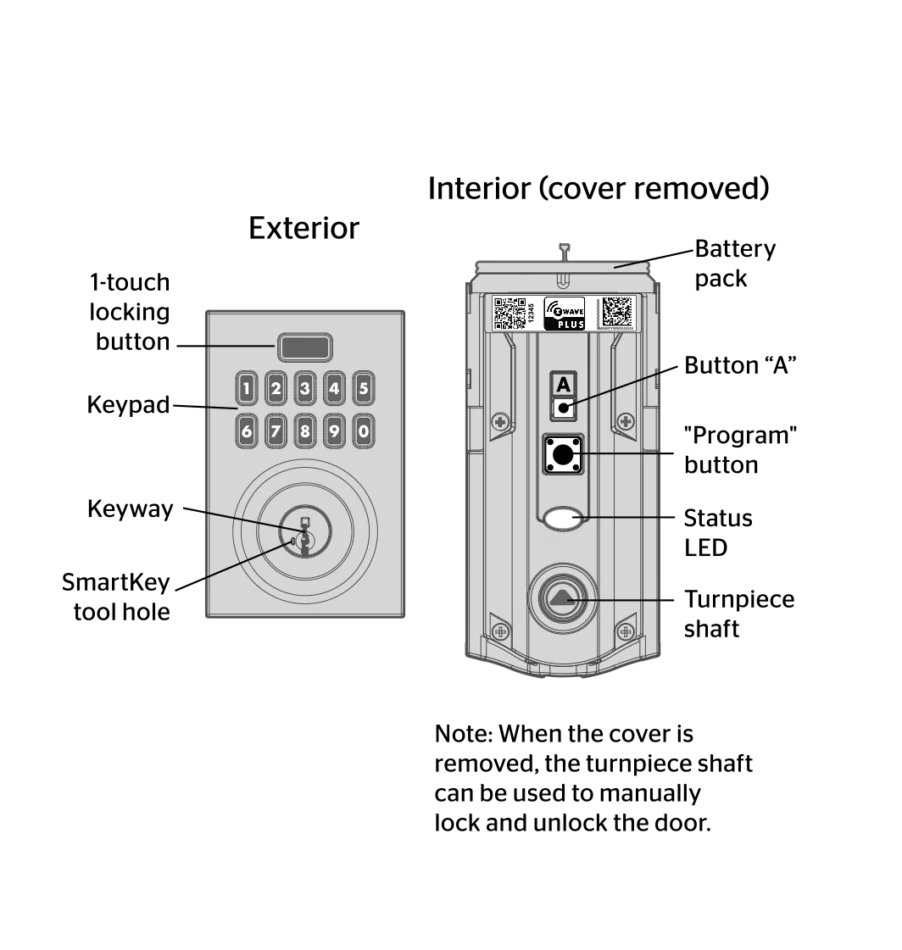
    • Begin by locating the interior cover of your Kwikset lock. This cover conceals the programming buttons needed to configure the auto-lock feature.
      Interior Cover

Step 2: Press Button “A” Once

    • Once the interior cover is removed, you’ll see the programming buttons. Locate button “A” on the interior side of the lock. Press it once to enter the programming mode.
      Press Button "A"

Step 3: Adjust Auto-Lock Setting

    • Press the button “2” multiple times until you reach your desired state. Green indicates that the auto-lock feature is enabled, while red indicates that it’s disabled. Take your time to ensure you’ve selected the setting that aligns with your preferences.
      Press Button "2"

Step 4: Finalize Settings

    • Once you’ve set the auto-lock feature to your preference, it’s time to finalize your settings. Press the Kwikset button once to save your changes. Your lock is now configured to auto-lock according to your chosen settings.
      Press Kwikset


Customizing Auto-Lock Time Delay

Perhaps you prefer a longer or shorter time delay before your Kwikset lock auto-locks. No problem! Follow these steps to customize the auto-lock time delay:

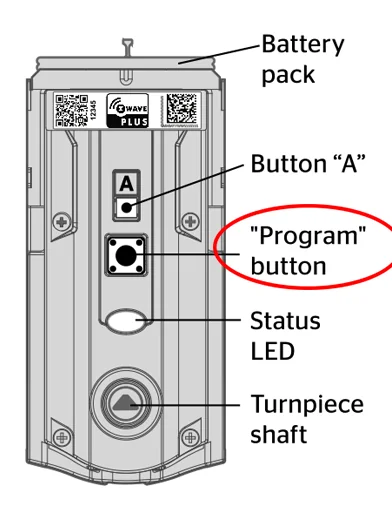
Step 1: Press “Program” Button Once

    • To begin customizing the time delay, locate the “Program” button on your lock. Press it once to enter the programming mode for time delay settings.
      Program button

Step 2: Press Button “A” Once

    • Now that you’re in time delay programming mode, press button “A” to indicate that you’re adjusting the auto-lock settings.
      Press Button "A"

Step 3: Select Time Delay Option

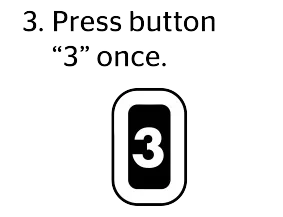
    • Press button “3” once to enter the time delay configuration mode. This will allow you to choose from a range of time delay options.
      Press Button "3"

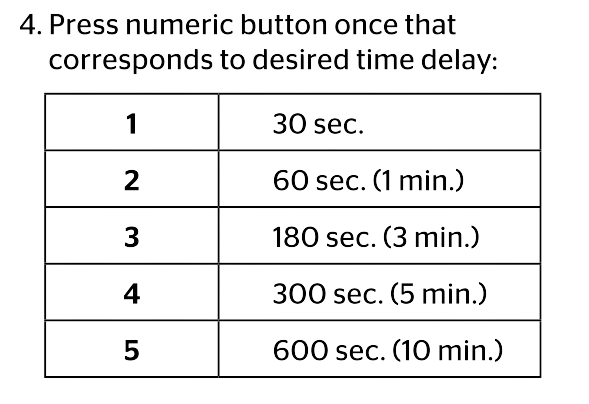
Step 4: Choose Time Delay

    • Using the numeric keypad, select your desired time delay. Each numeric button corresponds to a different delay option. Take your time to choose the delay that best suits your needs.
      Press Button "4"

Step 5: Save Your Settings

    • After selecting the appropriate time delay, it’s time to save your settings. Press the Kwikset button once to confirm and save your changes.
      Press Kwikset once


No Comments

Post A Comment