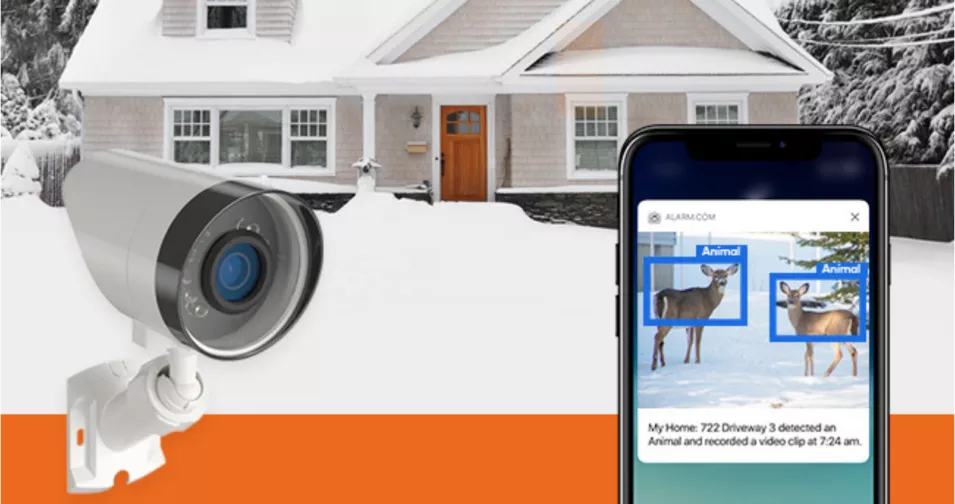
11 Dec Alarm.com Video Analytics Can Make Your Cameras Smarter
Smart video monitoring makes protecting your home/business super convenient and simple. It also provides much peace of mind being able to check-in at any time.
As long as you have internet access, you can check in from anywhere with your smartphone to make sure everything is in order. If you don’t have it yet, check it out here.
But what if I told you that home security just got even better?
Alarm.com recently rolled out a video analytics service that’s going to offer a new level of awareness and change the way you monitor and protect your home… for good.
Let’s dive into this new video analytics feature so you can see exactly what it is and how you can use it to better protect you and your loved ones.
Alarm.com Video Analytics: What Are the Benefits?
Alarm.com’s video analytics service works by analyzing data in real time and alerting you only when an important event happens (more on this in just a second). This means you can become even more aware of certain types of activities and also customize the alerts.
What makes the Alarm.com video analytics feature so cool is that it uses some impressive artificial intelligence to detect and distinguish between objects being viewed. That means this analytics service can detect whether an animal, person, or vehicle is in the camera’s field of view and triggering a specific event you have set up, based on the virtual zones you enable.
In addition to making your cameras smarter, you can also get 3000 additional clips a month by adding this service to your existing Alarm.com video plan.
Let me break that down for you.
What Alarm.com Video Analytics Can Do For You
With this object identification intelligence, you can customize your video analytics and have notifications sent only based on activities that you want to be notified of.
Here are a few examples:
Routine Activities
Mailman delivering packages every day, people coming to visit, kids coming and leaving, people dropping things off, and cars coming and going.
This video analytics feature won’t alert you of these routine events and occurrences.
Important Events
People lingering for too long on your property, cars idling outside your house for extended periods of time, and even other out-of-the-ordinary types of events like your neighbor’s pet coming and making a mess on your lawn, a child sneaking out in the middle of the night, etc.
This analytics service can alert you of these unusual events while ignoring the routine occurrences, all you need to do is set up certain rules and parameters.
Where to set up
These virtual zones can be set up wherever you want to have added protection (like your front porch, backyard, etc.) and customized based on the activity you want to monitor.
If there is a certain area of your property you want to monitor and be notified if people/animals/vehicles pass through, you can set this up with a tripwire event.
How to Set Up a Detection Rule
Want to instead monitor lingering vehicles/people/animals? You can set up ground-zero events and monitor loitering-type activity. If there is such an event, you will be notified immediately.
To set up this video analytics feature, let’s run through the technical part below:
Step 1: Set up your Camera
- You want to position your camera so that objects can be seen within the camera’s range and view. You’ll need to make sure that the objects you want to view aren’t farther than 25 feet away, or 15 feet at night.
- Make sure the camera is around 8-16 feet above the ground, and that the camera is pointing downwards at a 30°-60° angle.
- Ensure that the camera is facing the ground/floor area of the place you want to monitor, as this video analytics functions by tracking feet and vehicle’s wheels.
- Be aware of any bright lights (i.e., motion-triggered floodlights) near the camera that may attract insects or affect exposure and IR settings.
If you happen to move your camera, you’ll need to set up the rules again.
Where Should You Record?
Good ideas include:
- Driveway
- Front porch
- An area where kids or pets pass through, like the front yard
Areas to avoid:
- Spots in your yard with swaying trees and bushes, and other areas where there is constant, uninteresting activity
- Having the camera pointing outside through a window, as the reflection can cause performance issues.
Step 2: Create a Rule with Video Analytics
To set up rules, go to alarm.com.
Note: It is possible to create multiple Video Analytics rules on the same camera. Additionally, ground zones and tripwires can overlap.
- Log into alarm.com.
- Go to Video.
- Select Recording Rules.
- Press Add Rule.
- In the New Video Recording Rule window, select Video Object Detection.
Rule selection
- Click to select the desired camera.
2. Click to select the rule type:
- Use a Tripwire rule for when you are wanting to keep an eye on objects passing through the camera’s field of vision or when the objects enter and exit an area.
- Use a Ground Zone rule when you’re wanting to monitor loitering-types of activity.
- Make sure to delete Video Motion Detection (VMD) schedules associated with the camera you are using to set up a Video Object Detection Rule. Click OK to continue after prompted with this warning.
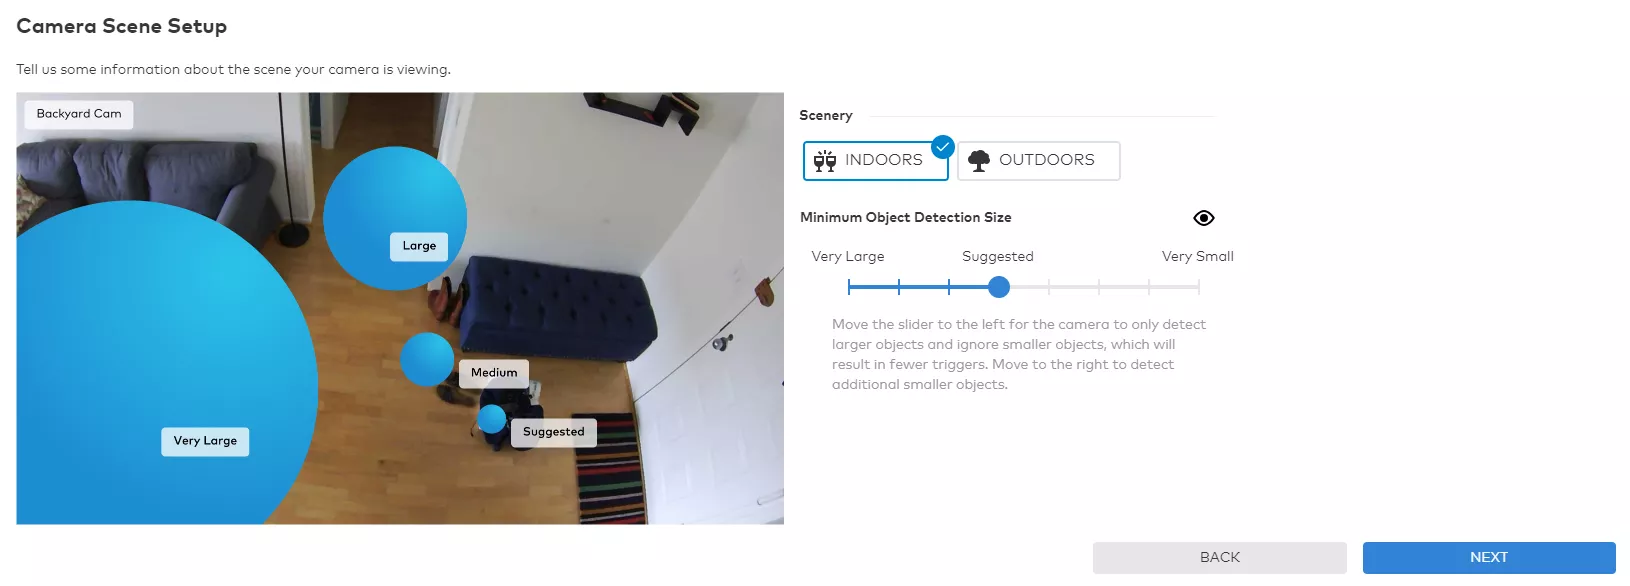
Camera scene setup
- Select indoor or outdoor depending on where the camera is pointing. If it will be exposed to the weather (rain, snow, etc.), be sure to mark it as outdoor.
Note: This setting is specific to a camera, not a rule, and must be the same for all rules on a camera.
- The Minimum Object Detection Size slider will determine the minimum object size detected by the rule.
Note: When set to Very Large, there will be fewer triggers, as it will only detect larger objects and ignore smaller ones. Very Small detects additional smaller objects.
Important: It is recommended to keep this at its suggested value upon initial rule creation.
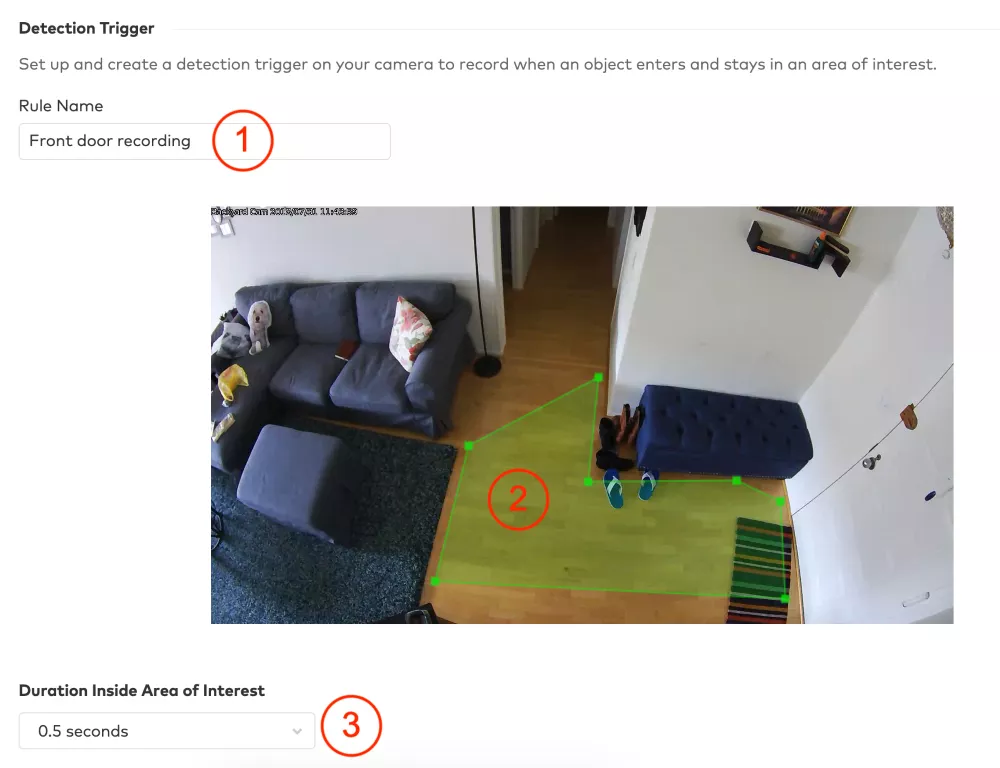
Configure Rule – Ground Zone
- Name the rule in a way that you can reference it later
- Select the area of interest by drawing a shape covering the ground where the object may linger:
- Double-click inside the camera’s field of view to draw a new shape from scratch.
- Click and hold inside the shape to move it around.
- Hold right-click to rotate the shape.
- Enter the duration inside this area of interest. This allows you to customize the amount of time you think is appropriate. If the object lingers in this area of interest for that amount of time, you will be alerted.
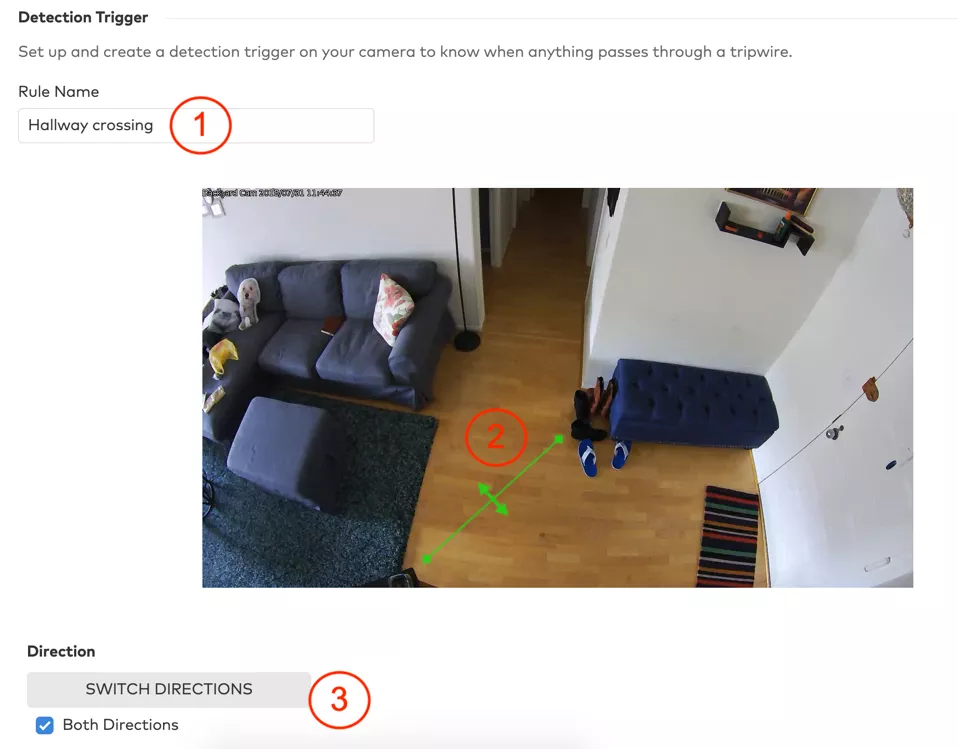
Configure Rule – Tripwire
- Give the rule a specific name so you can reference it later if needed.
- Draw the tripwire and make sure to cover the specific area of the ground where you want to monitor. If an object passes through this area, you will be alerted.
- Select which direction to monitor the flow of traffic, or choose to monitor in both directions.
Note: Targets will be monitored when moving in the direction of the tripwire’s arrow.
Rule scheduling and notifications
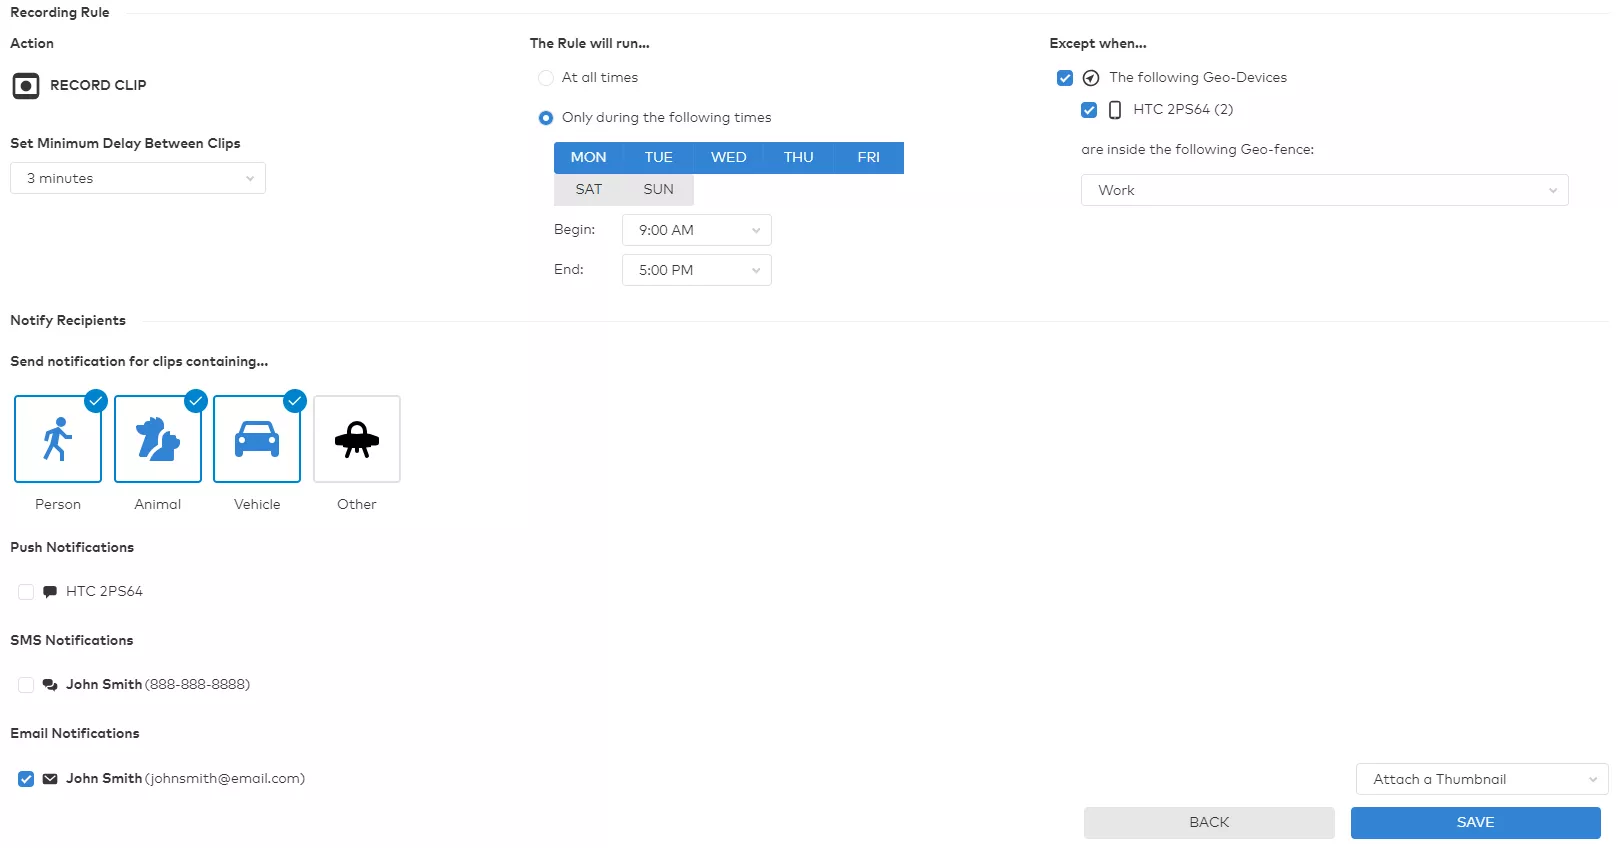
- Pick if you want the rule to be active all the time or specifically on certain days/times, and if there are any exceptions to the rule.
- Set the minimum time delay between clips. The shortest duration of time the rule will activate during times of constant movement.
- Pick the types of objects that would need to appear to send you a notification.*
- Decide how you want to receive notifications.
*Note: This option is solely used for sending notifications and will not alter which clips are recorded.
Ensuring rule accuracy
- Avoid intersecting tripwires and overlapping ground zones.
- Be sure to only draw the rule where the feet or wheels of an object will cross.
- Go back and adjust the Minimum Object Detection Size Slider after a couple of days if needed, depending on what was/wasn’t recorded and sent to you.
Note: Increasing the size will help to reduce false detection, and decreasing the size helps detect smaller targets.
Step 3: Viewing the video clips
To view video clips using the Website:
- Log into alarm.com.
- Press Video.
- Click Saved Video Clips.
- All clips with a valid person, vehicle, or animal classification will show up here. If you want to see a specific classification, change the selection in the Filters drop-down menu.
To view video clips using the app:
- Log into the app.
- Click the three horizontally stacked line icon
- Select Video.
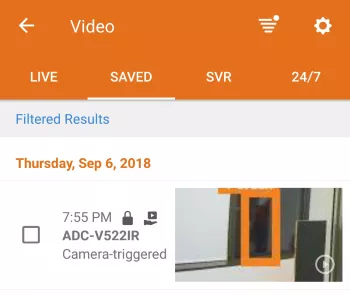
- Tap Saved.
- All clips with a valid person, vehicle, or animal classification appear here by default. To see clips only with a specific classification, or clips without a standard classification, change the selection in the Filtered Results drop-down menu.
Become More Aware
With Alarm.com’s video analytics feature, you can become more vigilant of the activity that is happening in or around your property. You can customize the types of alerts you want to be notified of and the type of activity you want to monitor.
This just another reason to protect your home with a smart security system.
Have any questions about the new video analytics feature offered by Alarm.com? Leave a comment below!



No Comments