
13 Dec Alarm.com Releases Their First Battery Powered Camera Opening Endless Possibilities
The new Alarm.com 4MP Battery Spotlight Camera: The First Fully Battery Camera From Alarm.com.
Alarm.com has officially introduced its first fully wireless, battery-powered security camera, and it’s already changing how homeowners and businesses approach outdoor security. The Alarm.com 4MP Battery Spotlight Camera brings high-quality video, flexible installation, and wire-free convenience. The flexibility of this camera to protect virtually anywhere gives you a major advantage in security monitoring, even in locations without traditional internet access. While the camera still requires a Wi-Fi connection, pairing it with a compatible cellular router allows it to operate entirely off-grid, making it an ideal solution for remote properties, construction sites, farms, and other hard-to-reach areas.
This new camera expands Alarm.com’s lineup by offering a portable, rechargeable, and installation-friendly option while still delivering the intelligent analytics and reliability that Alarm.com is known for.
Key Features of the Alarm.com 4MP Battery Spotlight Camera
- 4MP HDR Video Quality: The camera captures sharp, clear, and detailed video that perfectly for identifying people, animals, and vehicles.
- Battery Saver Analytics: Smart, energy-efficient video analytics detect:
- People
- Vehicles
- Animals
- Spotlight for Color Night Vision: The built-in spotlight activates during motion events, allowing for color night vision even in low-light areas.
- True Wire-Free Installation: No power cables. No outlets needed. Just mount it, connect to Wi-Fi, and start recording.
- Long Battery Life with Fast Charging: The 6450mAh battery offers multi-month use and recharges in under 5 hours via USB-C.
- Solar Panel Compatible: Connect to the official Alarm.com solar panel for continuous, maintenance-free charging.
- Wide 140° Field of View: Covers large outdoor areas effectively.
- Weather-Ready Design: With an IP65 rating, this camera withstands rain, heat, dust, and cold.
Where This Camera Works Best
This camera is perfect for hard-to-wire or off-grid locations, including:
-
- Yards
- Driveways
- Garages
- Sheds
- Side Entrances
- Vacation or Rental Homes
- Fences and Gates
- Barns or Storage Units
If you can mount it, you can secure it.
How to Install the Alarm.com 4MP Battery Spotlight Camera
- Pre-Installation Checklist: Unbox the unit. Carefully remove the device and all included components from the packaging.
Make sure you have:
- Alarm.com 4MP Battery Spotlight Camera
- Universal Battery Pack
- USB-C Cable
- Mounting plate, screws, achors
- 2.4 GHz or 5 GHz Wi-Fi
- Smartphone or computer
Note: Only the official Alarm.com solar panel is supported for charging.
2. Remove the battery pack:

-
- Press the oval button located on the bottom of the device to release the housing.
- Set the back housing aside and locate the black notch at the bottom of the battery pack.
- Press the notch inward and slide the battery pack downward to remove it.
3. To reinsert the battery pack:

-
- With the battery pack removed, carefully peel off any protective film covering the device or components.
- Align the battery pack with the cradle and slide it back into place. Make sure you hear the notch click to confirm it is securely inserted.
Alarm.com specifically designed and manufactured the removable battery pack for this camera to ensure superior reliability and consistent performance. This guarantees the battery meets the same high standards as the camera itself. A second hot-swappable battery will be available soon, making quick battery changes fast and seamless so your camera never goes offline.
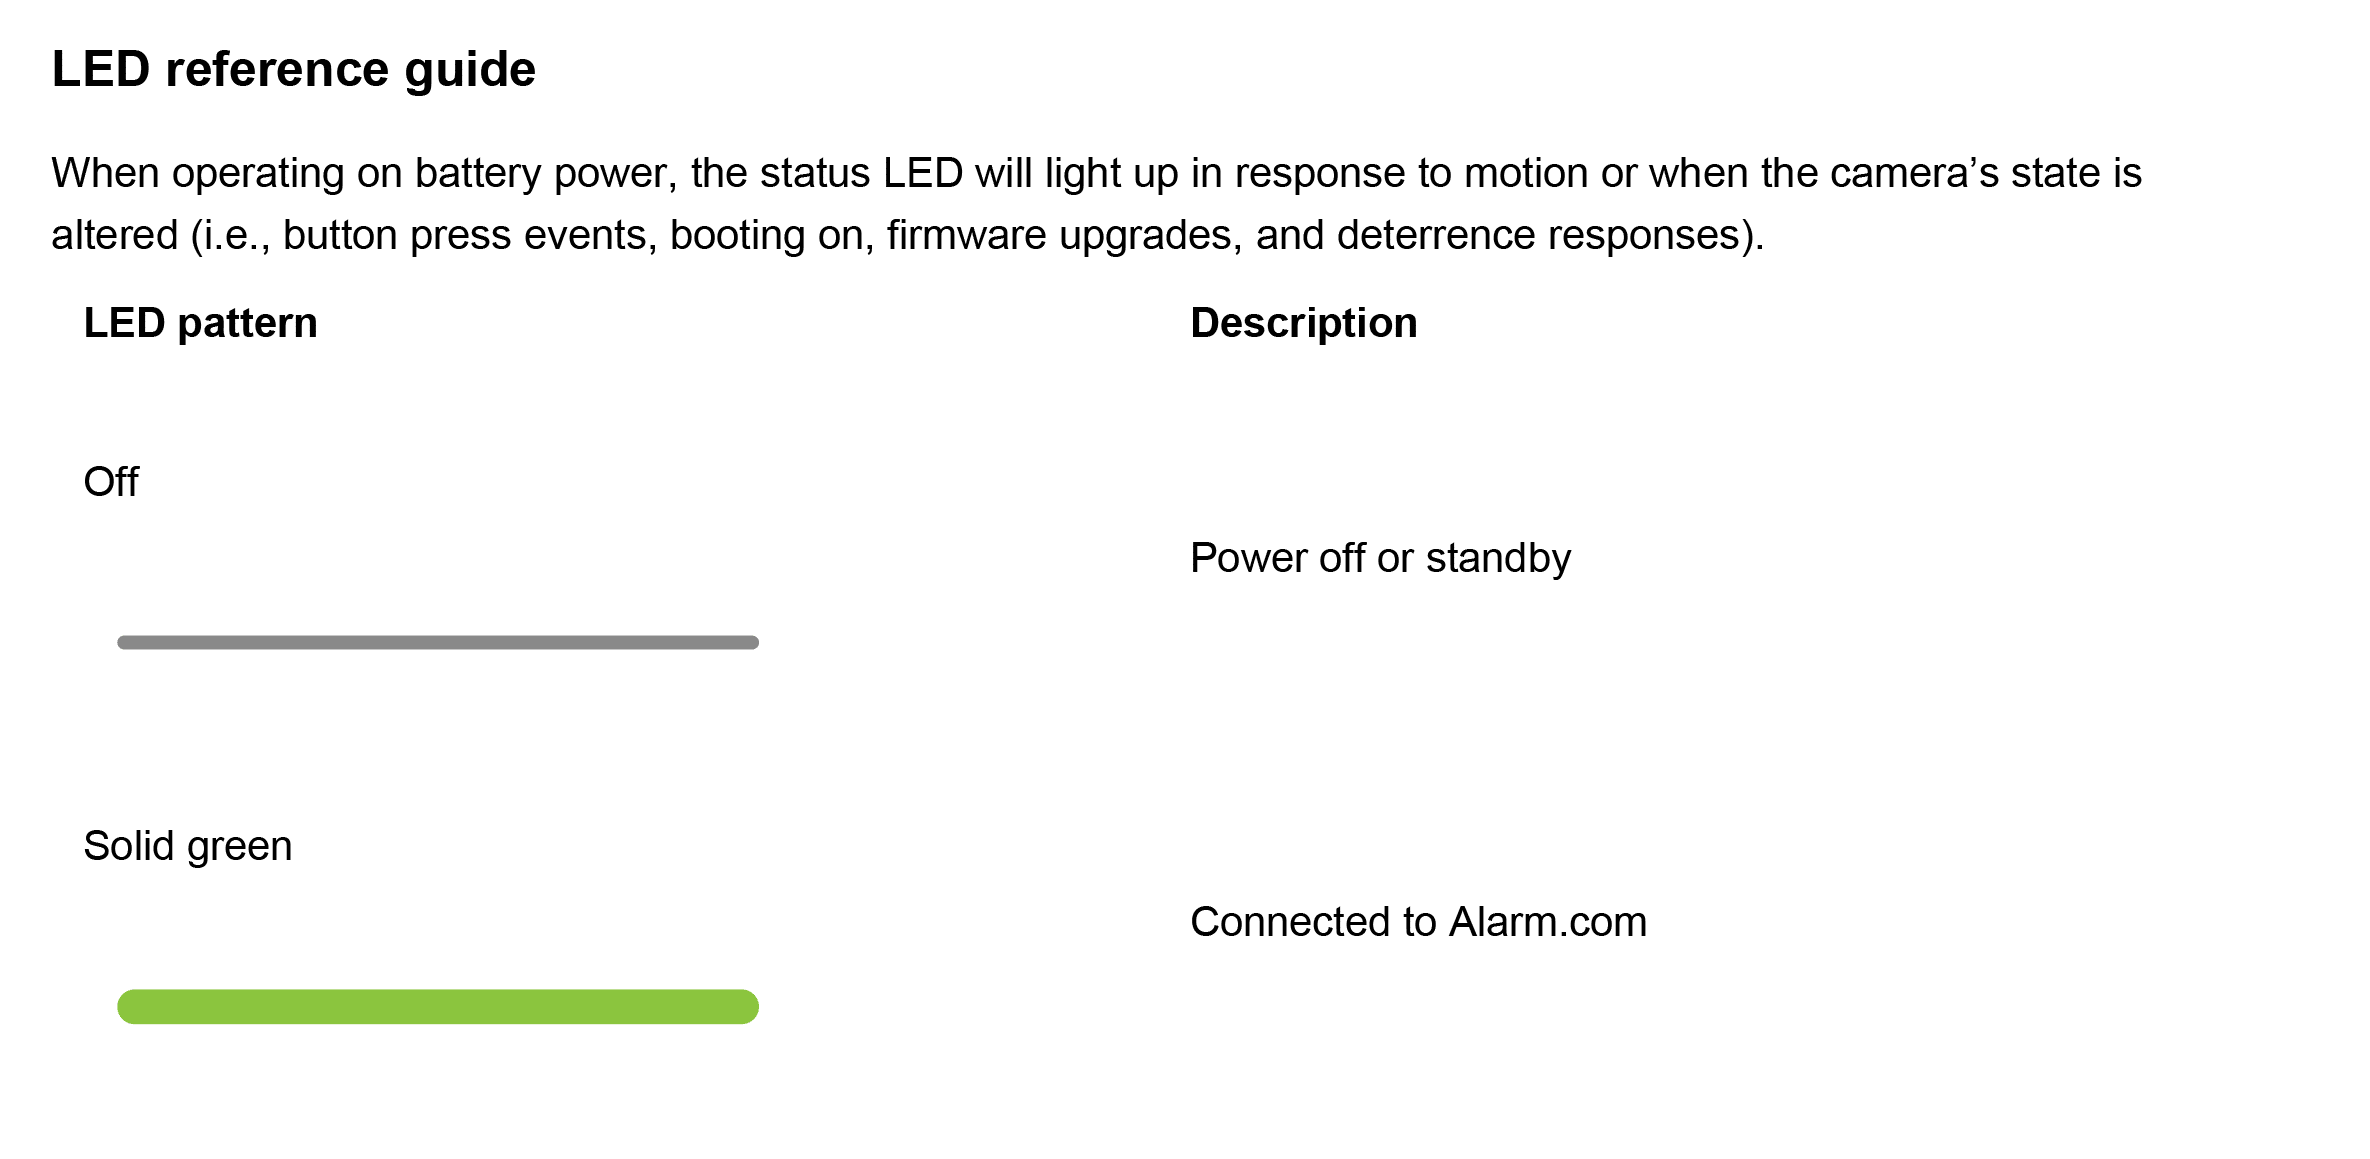
4. Verify the LED indicator on the front of the device goes into pairing mode (blinking white).

-
- When the device turns on, it begins blinking red to indicate the device is booting.
- If the device is new or has not been previously associated with a network, the LED should begin blinkingwhite to indicate it has entered pairing mode. If the LED is blinking white, replace the rear housing by pressing it together with the camera body, and proceed to the next section of the guide.
- If the LED light does not blink white, press and hold the multi-purpose button located on the side of the device (accessible once the housing is removed) for 3 seconds, or until the LED begins blinking white. Once the LED starts blinking white, release the button and proceed to the next section of the guide.

 Connect the camera to the Wi-Fi network:

Once the camera is powered and ready, you can proceed to connect it to Wi-Fi. The recommended method is Access Point (AP) mode. After powering on the camera and confirming the LED is blinking white, use your phone or computer to connect to the temporary Wi-Fi network that appears as “ADC-V…..” followed by the last six characters of the MAC address. Open a browser and visit “192.168.1.1”, then follow the on-screen instructions to connect the camera to your home Wi-Fi. When the LED turns solid green, the connection is complete.
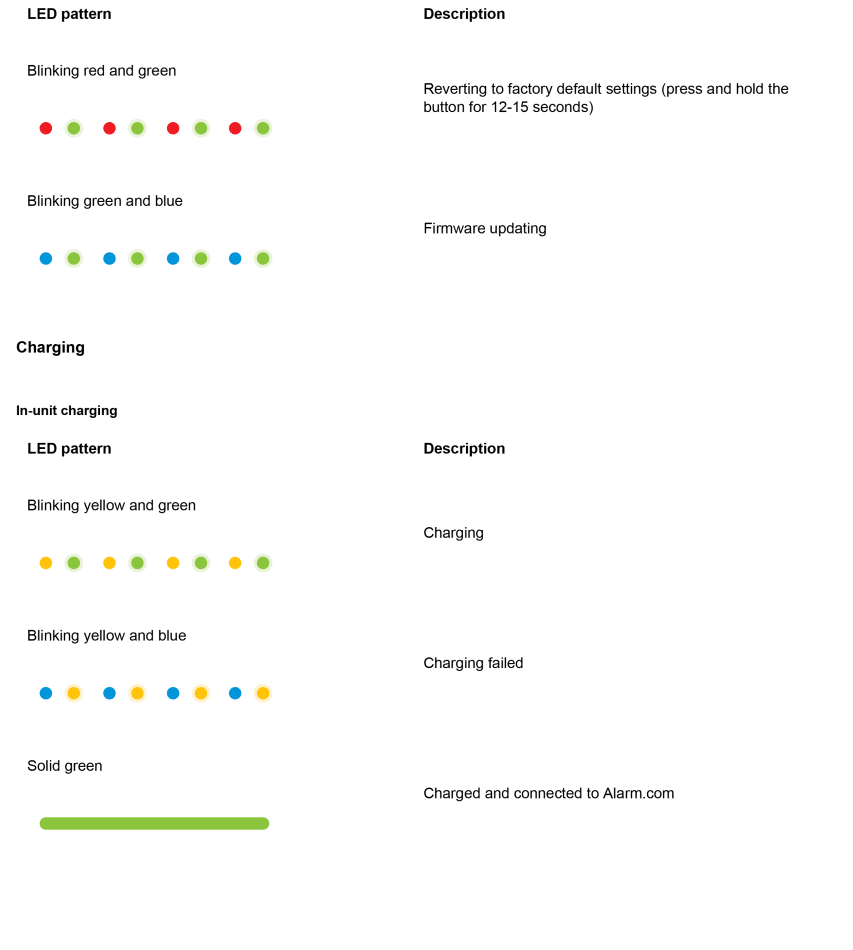
If you prefer WPS mode, open the camera housing, then press and hold the side button for six seconds until the LED begins blinking blue, and then press the WPS button on your router. The LED will again turn solid green once the camera successfully connects.
Enroll the camera to the account:
The camera can be enrolled to a customer account using the Partner MobileTech app, Alarm.com customer website, or Alarm.com app.
To enroll the camera using Alarm.com app:
- Log in to the Alarm.com app. The customer’s username and password for the account is required to log in.
- Tap
 .
. - Tap Add Device.
- Tap Video Camera.
- Tap Enter MAC Address, then enter the camera’s MAC address.
- Tap Install for the camera on the Device Found page.
- Enter a device name, then tap Next.
- Follow the on-screen instructions to finish adding the camera. The installation progress displays on the screen.
Once the installation is complete, move the camera to its final location. Prior to installing, verify the received signal strength using Partner MobileTech app or Alarm.com app. Once the signal strength has been verified, install the device with the included hardware.
Camera mounting overview:
The Alarm.com 4MP Battery Spotlight Camera features standard ¼” tripod screw threading, allowing compatibility with a variety of mounting options. A wall plate and wall mount are included in the box for flush surface mounting. Alternatively, the camera can be placed directly on a flat surface or used with a variety of third-party mounts and stands. Follow the instructions below to mount the camera to a flush surface.
Troubleshooting Tips
- If you have issues connecting the camera to the account, power cycle the camera and try again.
- If issues persist, reset the camera to factory defaults. Press and hold the WPS/Reset button until the LED is flashing green and red (about 12 seconds), then release the button. The camera will reboot to factory default.
If the camera was previously installed on a different Alarm.com account, it will need to be deleted before it can be installed again.
Using the Solar Panel (Optional)
If you choose to use the optional Alarm.com solar panel accessory, installing it is straightforward and designed to keep your camera charged outdoors without the need for manual recharging. The solar panel should be mounted in a location within nine feet of the camera and positioned where it can receive at least three hours of direct sunlight each day.
Once the panel is properly positioned, connect the USB-C cable firmly into the camera’s charging port and tuck away any extra cable behind the panel using the provided clips. After connecting it, open the Alarm.com app or website, navigate to the camera’s device page, and verify that the camera recognizes the solar panel as its power source. This confirmation ensures that the solar panel is properly aligned and delivering power. It’s also a good idea to check the camera’s live view to make sure the solar panel isn’t accidentally visible in the camera’s field of view. Periodically wipe the panel clean to remove dust or debris, and review its positioning from time to time to maintain optimal charging efficiency. If positioned properly and given the right conditions for sunlight you may never have to charge the battery.
Final Thoughts
The Alarm.com 4MP Battery Spotlight Camera is the most flexible and installation-friendly camera ever released by Alarm.com. With fully wireless operation, intelligent analytics, color night vision, and solar support, it delivers modern smart security for any home or small business.
Whether you’re securing a shed, monitoring a yard, or adding video protection where wiring isn’t possible, this camera provides a powerful, portable solution.
No Comments