Shop
Shorty Mite SPDT Rx/Neo Magnet 24″ Armored Cable
$38.00
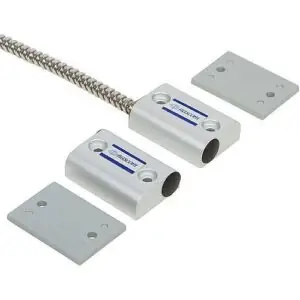
Shorty Mite SPDT Rx/Neo Magnet 24″ Armored Cable is a short, 2″ block switch, designed for man doors. It combines the installers’ choice of contact configuration with an N35 NdFeB magnet for maximum gap performance.
Description
Product Overview
Shorty Mite SPDT Rx/Neo Magnet 24″ Armored Cable is a short, 2″ block switch, designed for man doors. It combines the installers’ choice of contact configuration with an N35 NdFeB magnet for maximum gap performance.
The closed-loop version of the Shorty Mite SPDT Rx/Neo Magnet 24″ Armored CableS prevents false alarms caused by warping or shifting of doors, and features our unique NO DEAD SPOT technology.
Features
- No Dead Spot Technology
- 24″ Armored Cable Lead Protection
- Extra Wide Gap – N35 NdFeB Rare Earth Magnet
- 36″ 22 AWG Wire Leads
- Listed to UL634 Standard
- Extruded Anodized (Type II) Aluminum
Main Features
- No dead spot technology
- 24″ armored cable lead protection
- Extra wide gap
Technical Features
- Contact Configuration SPDT
- Lead Length 36″
- Lead Length (mm) 914.4
- Mounting Type Surface Mount
- Recommended Use Door
- Termination Style Wire LeadsPRODUCT TYPE (1 or 2 digits):
• ST = SWITCH/MAGNET SET
• SW = SWITCH ONLY
• M = MAGNET ONLYCIRCUIT (0, 2 or 3 digits):
• Blank = CLOSED LOOP
• 2CR = DUAL CLOSED LOOP
• FB = OPEN LOOP
• SD = SPDT
• DD = DPDT
• HS = HIGH SECURITYINSTALLATION INSTRUCTIONS
• Position the switch on the door frame and the magnet on the door in the desired location.
• Place one of the enclosed spacers under the switch and one spacer under the magnet and align the switch and magnet housings as close as possible on the door with ¼” gap between the housings.
• Mark the mounting hole locations and drill mounting holes using a drill bit adequately sized for a #6 self-tapping screw.
• Place the spacer under the switch and attach to the door frame using two #6 Self-Tapping screws.
• Place the spacer under the Magnet and attach to the door using two #6 Self-Tapping screws.
• Connect an ohm meter to the switch leads and open and close the door to test the switch for correct operation.
• Connect the switch leads to the alarm system.
Please check out our YouTube Channel for more information.


Maria Mac –
Great product works well!